Monday, February 8, 2010
Studio envy....SO not needed...
When clients or fellow photographers pop by my studio I am always getting hit with suggestions on making my studio more......"professional looking"....So I thought I would post my reasoning for not spending a lot of money on a set up....
I know I may get in some trouble with the studio creators out there....and there is nothing wrong with them...sure they serve a purpose with their fancy gadgets, backgrounds and the like...and if you can get a hold of a freebie studio...have at it:) But if you are like myself, who uses sim backgrounds and don't need pre-made backgrounds or use a custom light setting...a simple box made by your own widdle hands will do just fine...
Total cost of my studio? 10$L for the texture upload...lol
My process is very simple...Avatar on blue screen....background taken separate at sim of choice then drag and free transform Avatar...easy peasy:) For those going "Free transform? easy wha?" Fear not...it's not as hard as you think...
I open a new doc....usually a large size like say, 4000wx6000h.......HUGE....lol I open my background pic....drag it onto the new layer.....then up in Edit at the top of your interface, middle of the drop down menu is Free Transform. What that will do is select the background layer, framing it with lines with little boxes in the corners....just pull and stretch those lines until you background fills the new document......you will have to eye the proportions...make sure you aren't stretching it too thin, wide, tall....but you can stretch this to an unbelievably large size and move the background pic around to focus on something in particular in that pic....or just to fit.....but the awesome thing about this tool is this.....It will stretch that picture WITHOUT loosing resolution!!!
If you have tried to resize a pic to fit a larger document, then dragged it to the doc...you will notice it's blurry....not crisp.....that's because it's lost it's resolution.....Free Transform eliminates that all together.....
Now...when you get more confident with this tool you can play with the warp feature....perspective, distort...all kinds of fun things..and soon....it will be a tool you can't live without.
Give it a try!
Saturday, February 6, 2010
A few tips on producing high quality SL photos
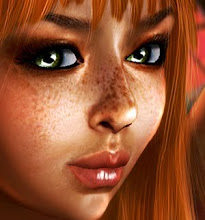
This is a pic I did just for kicks between assignments. Wanted to see just how far I can go with making an avatar NOT look like an avatar...lol
The first and most crucial tool I feel all SL artists should learn is liquify.......I agree...it can be quite intimidating, but with a little practice, it becomes second nature.
I rarely mess with the default settings Photoshop has for the liquify EXCEPT the brush size. There's no need to mess with pressure and all that unless you really know what you are doing...and I do not...haha
I suggest taking your pics in world at a ridiculously large size and saving them to hard drive as opposed to screen capturing or saving as textures. The size is VERY important and high rez is ALWAYS better to work with. You can zoom in real close and get to those icky sharp edges without distorting the pic as a whole. I also advise to clear out your hard drive of all the large raw shots once you are done with them. They can take up a lot of space and slow you down...I do a sweep once a week. I am asked constantly how my pics come out so crisp and clean....this is why...
What I did with Ms. Queenie up there took multiple layers...like a total of 52...The hair, crown, face jewels and flowers are hand painted....and I did every stage on a separate layer. There are photoshop artists way more comfortable then myself that can do these things in less layers..but I love the option to go back and erase something minimal as opposed to starting ALL over again.
LEARN LAYERS!!!! You can do lots of fun toning and coloring tricks with layer options. I paint all my shading on a separate layer set to Multiply....pick a color the shade of the skin you are working with with the eyedropper tool. It will darken every layer beneath it without looking "painty".
Dodge and burn!!! Some SL skins can come across very flat in a photo....dodging the highlights instead of working with your lighting source in world is just way easier for me. I take my pics in my studio with a midday setting, bumped the gamma up a bit and work on dimension in photoshop. And really..there is no windlight setting that gives good back lighting. Keep in mind that light doesn't reflect on skin in one basic direction. Just because your light source is coming from the top left of your photo, doesn't mean the jaw line on the right of a face is completely shadowed.....dodging the outline slightly on the opposite side of your light source will make your avatar pop off the screen......makes them touchable. Don't go nuts with the dodge tho....I too can get a bit carried away. I set my dodge intensity at about 6 for light skins....15 for dark and I ONLY dodge the parts that I would think normally are hit by the light.....cheek bones...tips of the nose and chin....jaw line...slightly more intense towards the light source and not so on the opposite side.......the round curves of the hips....and so on. you will know when you get too carried away...your avatar will have an orange aura...hehe
As far as filters...well.....some I shall have to keep to myself...LOL The fun of photoshop is creating your own style. Don't be afraid to play with photoshop!!! You can't break the program and the worst thing that can happen is you have to start a pic over again.....which happens to me OFTEN.
I have talked with numerous people in world...and for those who would rather not learn...they all have the same reasoning..."It's such a huge program!" YES!!! heheh..it is.......and even working with it for 8 years...I don't know all there is to know and am learning something new every day....Masking still scares the hell out of me...LOL. I played a lot, found what worked for the job at hand and just ignore everything else. I'm not the most organized person in the world....some would say scatter brained...lol.....so I try not to overload myself with information that will be useless to me in the long run. I can get to those things later when I need to...and so can you:)
LOOK AT OTHER ARTISTS ALL THE TIME!!!! I'm not saying copy an artist work....*serisouly.....do NOT COPY!!* but LOOK at a lot of art....Deviant Art is great place to admire some of the worlds most talented digital artists and you can learn a lot from just browsing a great gallery. I try to accept the help when it's offered but put my own spin on a pic. Some say my work is very stylized and animeish.......and that's EXACTLY what I was going for...lol I watch Youtube like it's going out of style and speed painting videos are my crack......Don't stick to just painting tutorials.....watch actual RL photography tutorials....Much of what we do in SL is what fashion photographers have been doing for years....airbrushing, free transforming..moving body parts about for the most visually pleasing results....and I learned ALL of that from Youtube.
I do hope some of this helps...as long winded as it was...lol
-Divine
TUTORIALS!!!
Seems my tutorial links have gotten lost in my flickr......I am getting messages asking for video examples of my work and they ARE there....just not displayed in the most convenient manner....
Here is a link to my Youtube with 3 tutorials. Liquify, Hair and a little mouth modification. Nothin' too fancy...but they may help someone out there^^
http://www.youtube.com/user/DivineMacabre
Here is a link to my Youtube with 3 tutorials. Liquify, Hair and a little mouth modification. Nothin' too fancy...but they may help someone out there^^
http://www.youtube.com/user/DivineMacabre
Labels:
Photoshop,
Second Life,
SL,
Video Tutorials
What a new year.....
So.....thought I would give this blogger thing a try since I've had an account since September '08 and have yet to post one...lol
So maybe this first initial post should be about getting to know Divine Tokyoska a little better. I have been on SL for a little over 2 years now....wow....time does fly! I have met some amazing people and have done some amazing things in that time, and haven't one regret about my Slife:) I have managed to make a comfortable niche for myself in SL and feel very blessed to have found this virtual world that has done nothing but make me a better person in my RL. It's a sweet release from my chaotic reality and I have learned so much.
This new year hasn't been very kind to me RL wise, but SL couldn't be going any better. Who would have thought that my SL would be funding my RL?? Some say I lucked into my new profession...and yes...luck has A LOT to do with it...but I have busted my ass to get here...and plan on busting my ass to stay here.
This blog will simply be used to update my clients about my status and displaying my works. I plan on adding as many tutorials as I can to help those just getting started in this digital art game and hope to inspire many up and coming SLartists! You CAN go places in SL!! It's just a matter of hard work and finding your groove. Took me 2 years to get where I am, so I can't say it's a quick and easy road...but great things can happen! And I wish everyone could share in my good fortune.
So...I hope you enjoy your visit to my little blog and find it useful.
Big hugs and all that!!
-Divine
Subscribe to:
Posts (Atom)
Create a playlist at MixPod.com